
1. Purpose of the feature.
From ScaffPlan 1.7 allows to add vertical or horizontal encapsulation with defined overlap and top and bottom offsets by tracing over bays in the model.
Insertion of encapsulation by points is available on the contextual toolbar and the Encapsulation tool menu under the Input type option.


2. Insertion by points.
To add encapsulation over a bay line:
- Show snapping points for standards or tubes to allow snapping precisely while tracing the bay live over.
- Click on the Encapsulation tool once to open contextual toolbar.
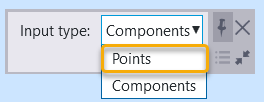
- Change Input type to Points:
4. Define type of a layout to use: Closed or Opened:
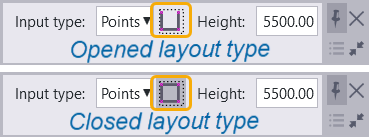
5. Optional: Define Height of the encapsulation to be inserted (can be changed after insertion).
6. By clicking to the snapping points shown at step 1 trace over a bay line defining placement of the encapsulation.
7. Press the middle mouse button to add encapsulation.
8. Interrupt the command from running by pressing Escape.
9. Click once on the encapsulation to select and adjust its setting from the contextual toolbar as required by changing values for:
- sheet width
- top, bottom extensions
- front offset
- direction (vertical/horizontal)
- sheet overlap
- height
- layout type (closed/opened)
2. Available options.
Encapsulation inserted by points supports following options:
2.1. Sheet width.
Following sheet widths are available for 45m long sheet size:
- 2m wide
- 3m wide
- 4m wide
2.2. Top Extension.
Calculated and defined from the top insertion point to the top of the last sheet.
To change the top extension:
- Select the encapsulation.
- In the Top ext. box type the offset value.
- Press Enter to take into effect.
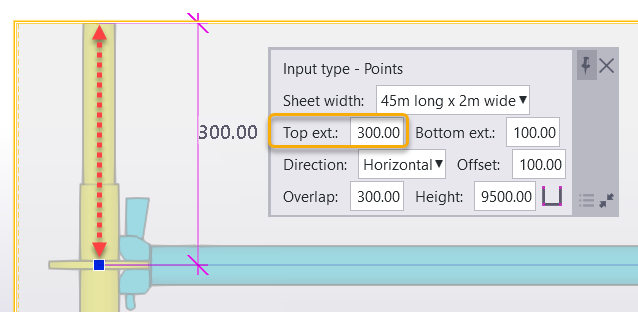
2.3. Bottom extension.
Calculated and defined from the top insertion point + encapsulation height + Bottom extension:
- Select the encapsulation.
- In the Bottom ext. box type the offset value.
- Press Enter to take into effect.

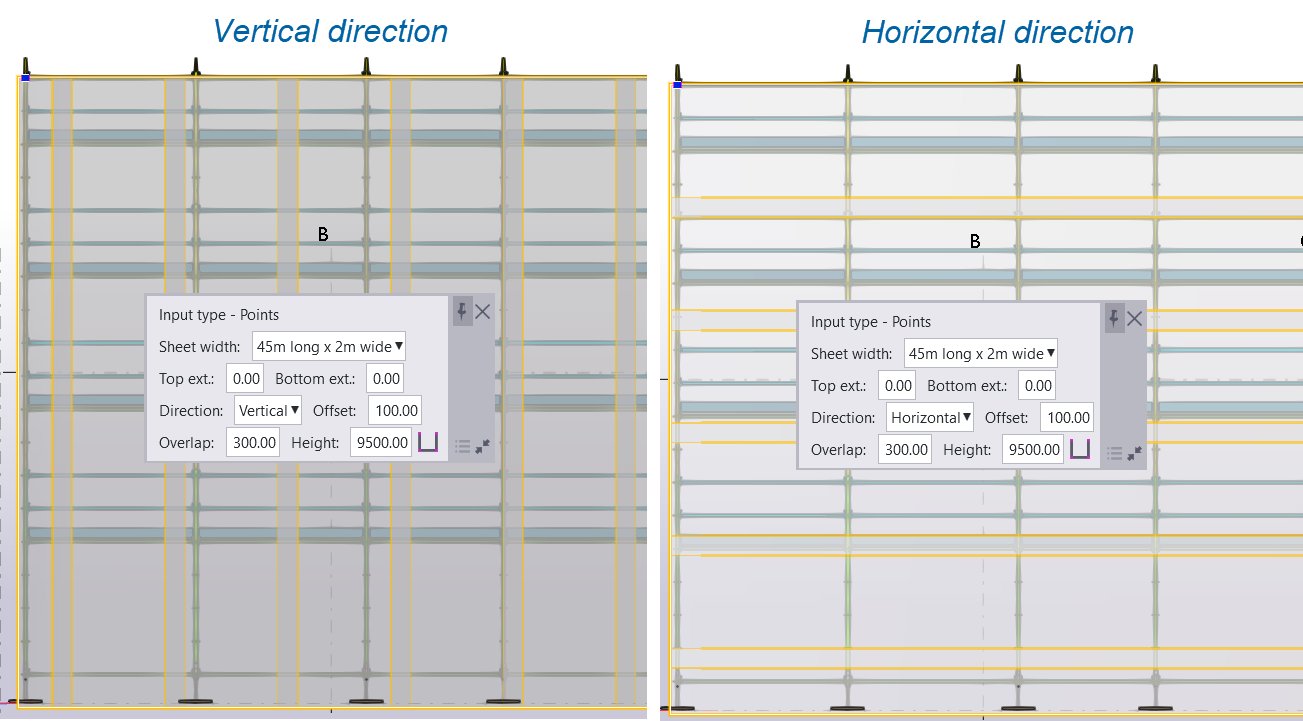
2.4. Direction.
Allows to change direction of the encapsulation from Vertical (default) to Horizontal:
2.5. Face offset.
Sets the face offset from the insertion point to the encapsulation sheet:
- Select the encapsulation.
- In the Offset box type the offset value.
- Press Enter to take into effect.

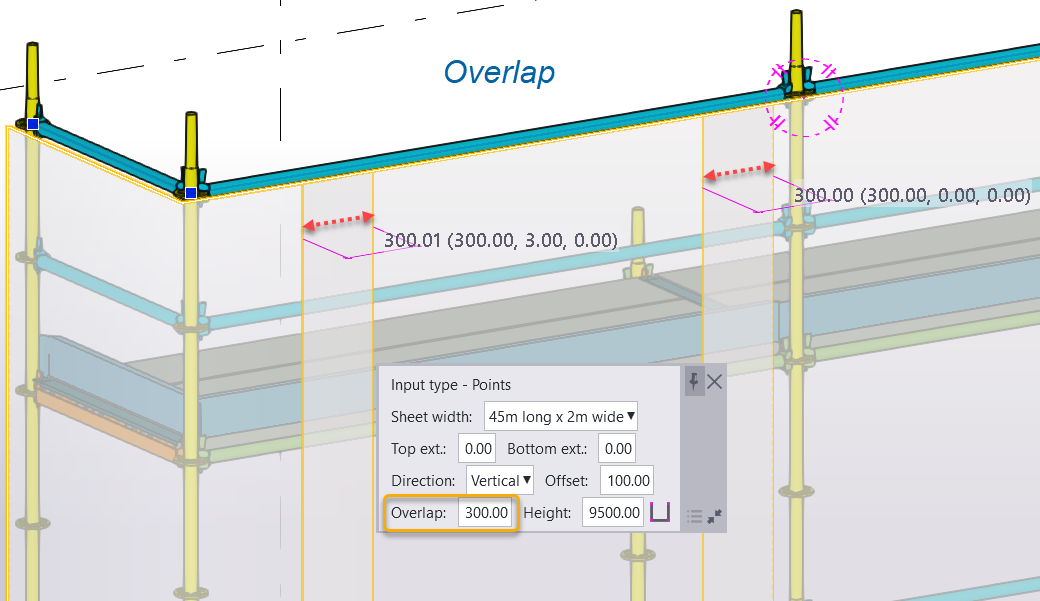
2.6. Overlap.
Sets an overlap value for the encapsulation sheeting:
- Select the encapsulation.
- In the Overlap box type the offset value.
- Press Enter to take into effect.
2.7. Height.
Defines height of the encapsulation sheeting.
- Select the encapsulation.
- In the Height box type value.
- Press Enter to take into effect.
